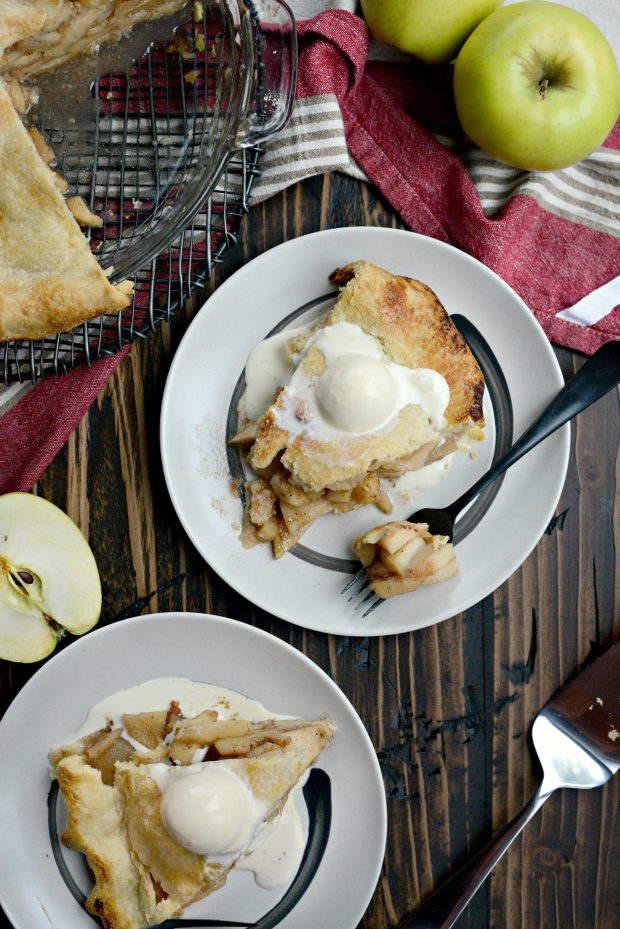
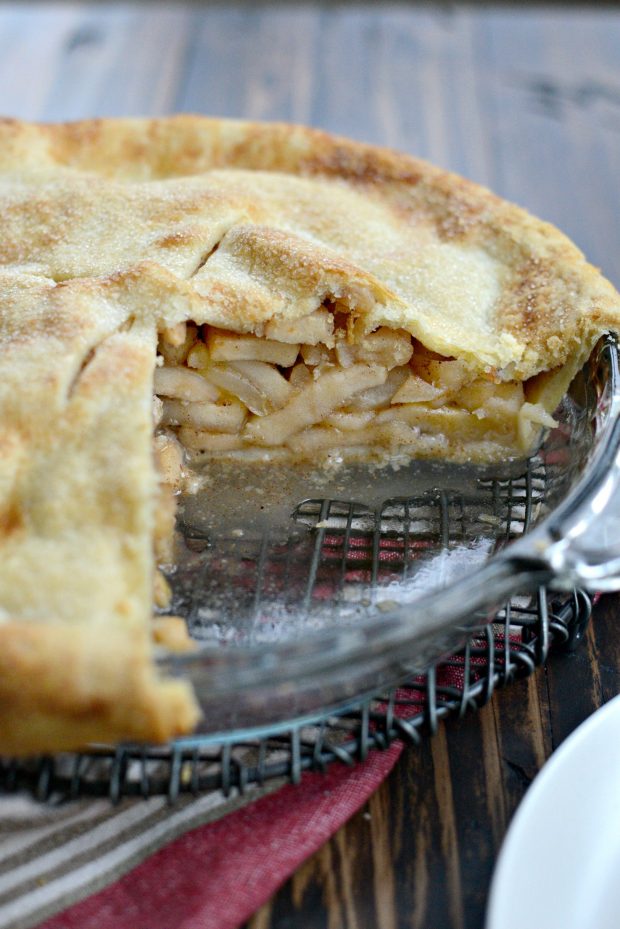
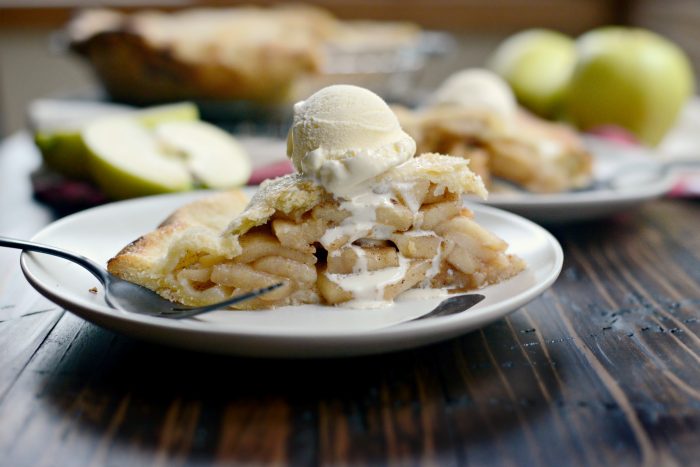
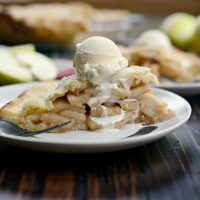
In this Homemade Apple Pie recipe, apples new partially cooked first, and cooedl before adding them in to the bottom pie crust. Doing this eliminates shrinkage while the pie is baking in the oven. Making pie filling this way means you won’t get that big gap of air between the piecrust and filling. So you’ll have copious amounts of apple filling goodness to go with your flaky pie crust and ice cream.
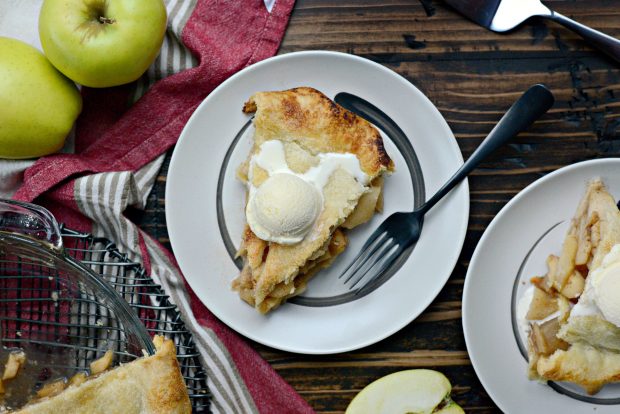
There’s nothing better than a slice of warm homemade apple pie.
With coffee. On a cold and rainy fall day. And that’s exactly how it all went down. It was bliss. The weather here in Michigan has been dreary. Overcast skies, windy and rainy and just the perfect ambiance for pie.
Almost 7 years of blogging, 845+ recipes/blog posts and one cookbook later and I’m just now sharing my favorite apple pie recipe. What is my deal? And with one day remaining in September and before the pumpkin-spice-everything recipes start flooding the interwebs– or have they already started? — I wanted to end my favorite month of the year with pie. Homemade apple pie made from scratch.

There’s no better way to do it.
Why is this my favorite apple pie? I love this particular recipe because you partially cook the apples first, allow them to cool before adding them in to the bottom pie crust. Doing this eliminates shrinkage while the pie is baking in the oven. Like that pre-shrunk off the shoulder tee that you can just throw in the drier. Making pie filling this way means you won’t get that big gap of air between the piecrust and filling. So you’ll have copious amounts of apple filling goodness to go with your flaky pie crust. And ice cream. 🙂
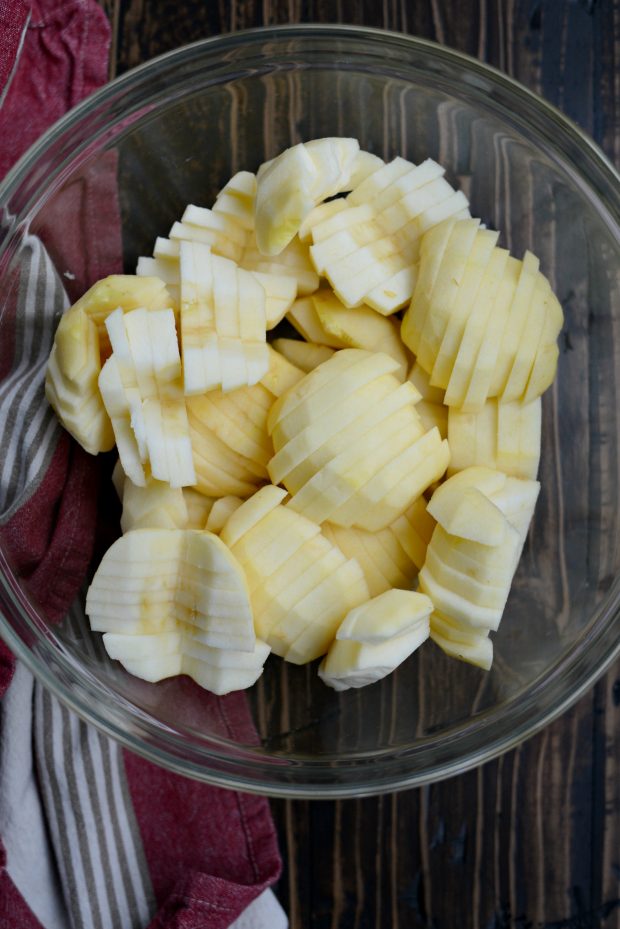
To make the filling, start with 3 pounds golden delicious apples.
Peel, core and slice them 1/4 of an inch thick.
Why golden delicious? Well, I’ll make a long story short. When I first was married (15 year ago) my mom gave me the Joy of Cooking cookbook, as she does all her daughters. You know the book, 10-inches thick with every recipe known to man, red ribbon… This book is where I learned how to make this pie. In the book, the authors state why golden delicious apple are preferred. They say (and I would agree!) that they hold their shape and don’t flood the pie with their juices. I would add that the flavor is perfection. Gala and Fuji apples are also good. But I wanted the best of the best. And I’ve never used anything other than golden delicious.
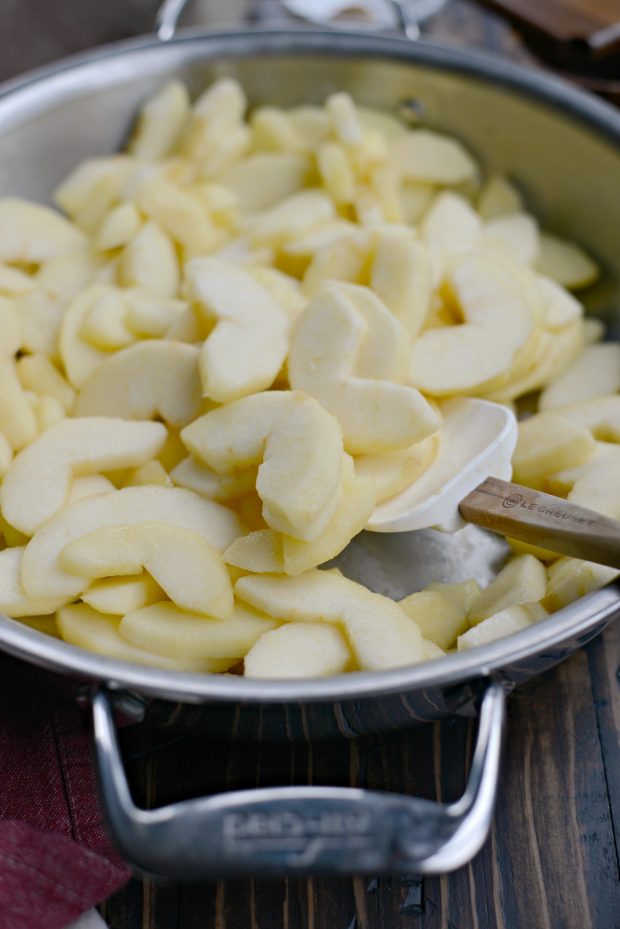
Heat a large, and I mean large! 12-inch, deep sided pan on medium-high heat. Once hot, drop in the 3 tablespoons of butter… it should sizzle! Then add in all of the apples and toss to coat in the butter. Reduce the heat, cover and cook for 5-ish minutes or until the outside of the apples is tender but the middle is still a bit crunchy.
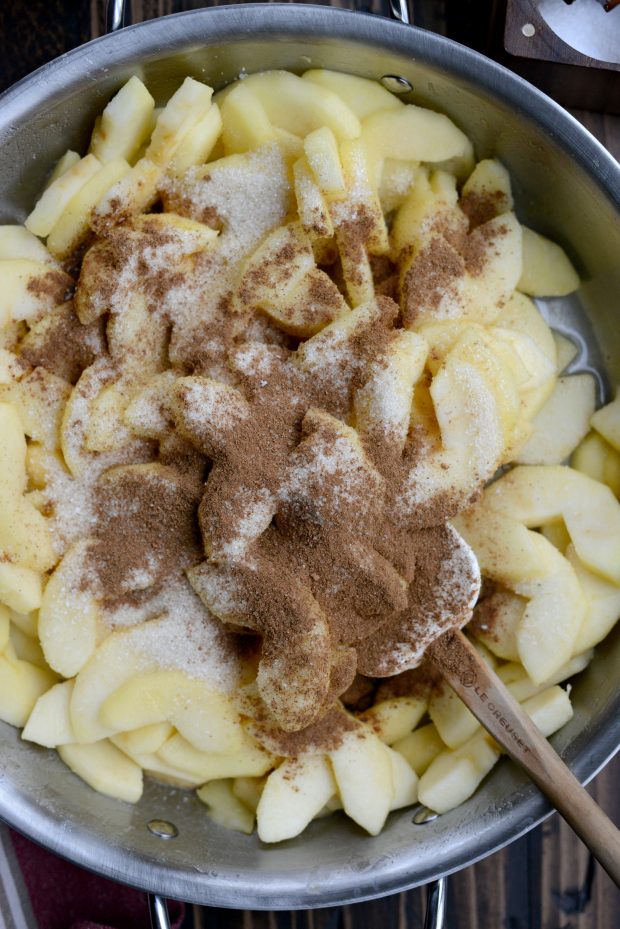
Add in the tablespoon of lemon juice, 1/2 cup of sugar, 1-1/2 teaspoons of homemade apple pie spice (1 teaspoon of cinnamon can be substituted for the apple pie spice) I also add in a few extra shakes of cinnamon to the filling. Increase the heat to high, stir often until the juices are released from the apples and starts to thicken.
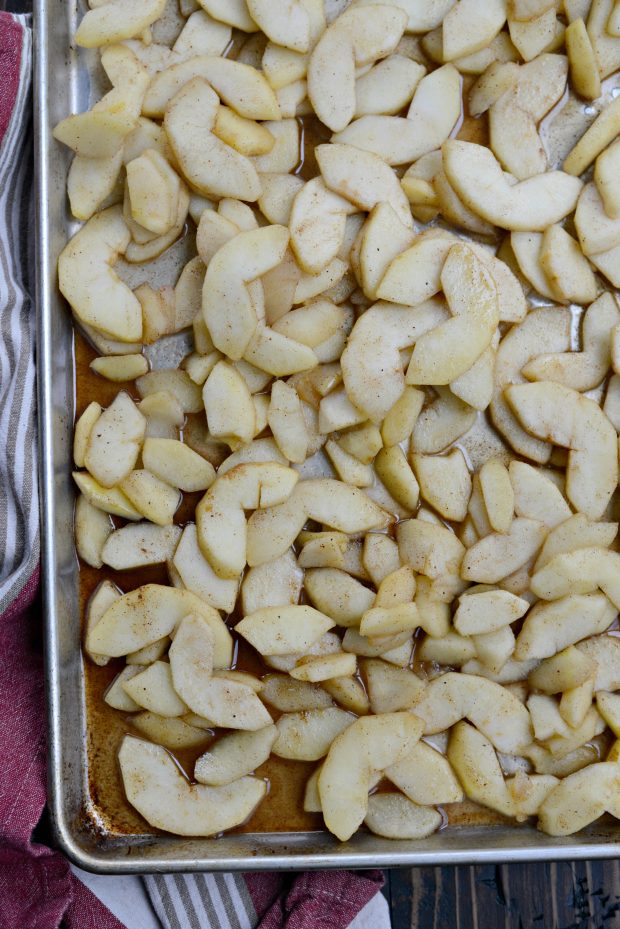
Then I transfer the apples to a rimmed metal baking sheet, spread them out and allow them to cool. This only takes about 30 minutes or so. I usually roll out my pie crusts in the meantime.
Preheat to 425℉ (or 220℃).
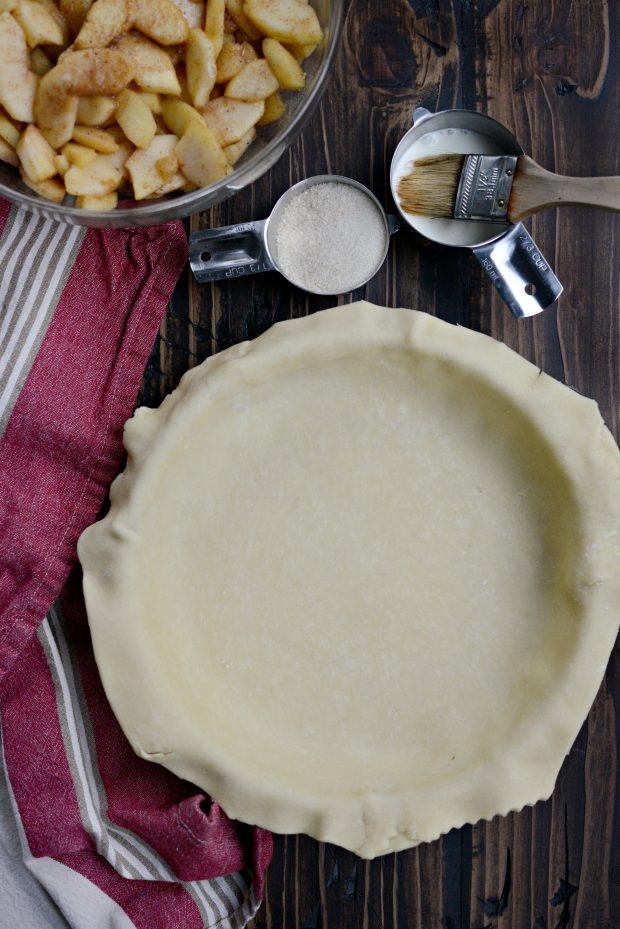
I rolled the pie crust out to a 12 to 13-inch round, placed it into a 9-inch deep sided pie plate, trim the edge with scissors so there’s an inch overhang and then pop it back into the fridge and roll out the next crust.
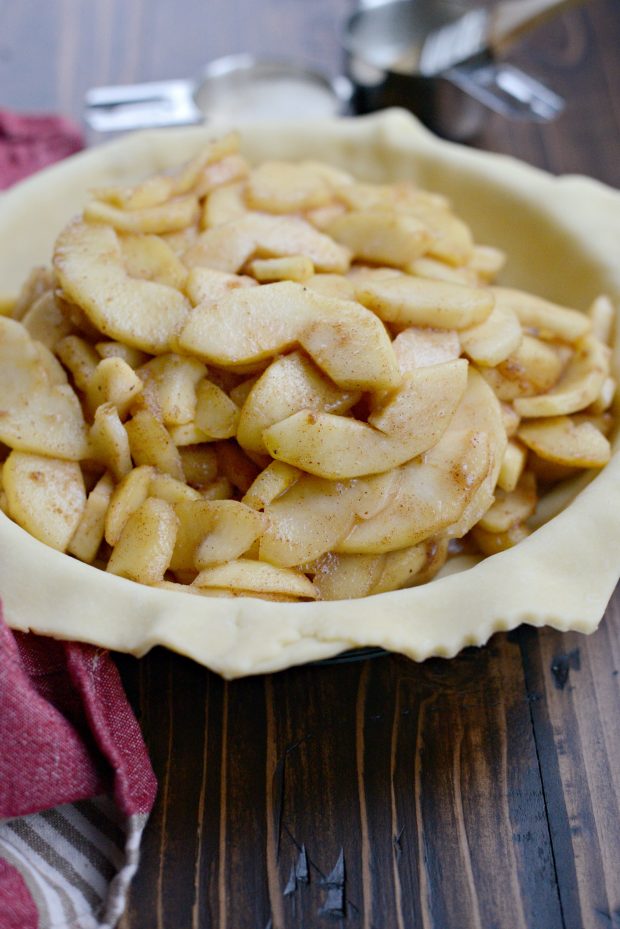
Then I add the apples to the chilled bottom crust and brush some water or heavy cream around the overhang.

Place the second crust over top, fold over the bottom crust and crimp the edges, brush the entire top crust with more heavy cream, make slits for air vents and sprinkle with lots of sugar.
Then the homemade apple pie is off to the oven to bake.
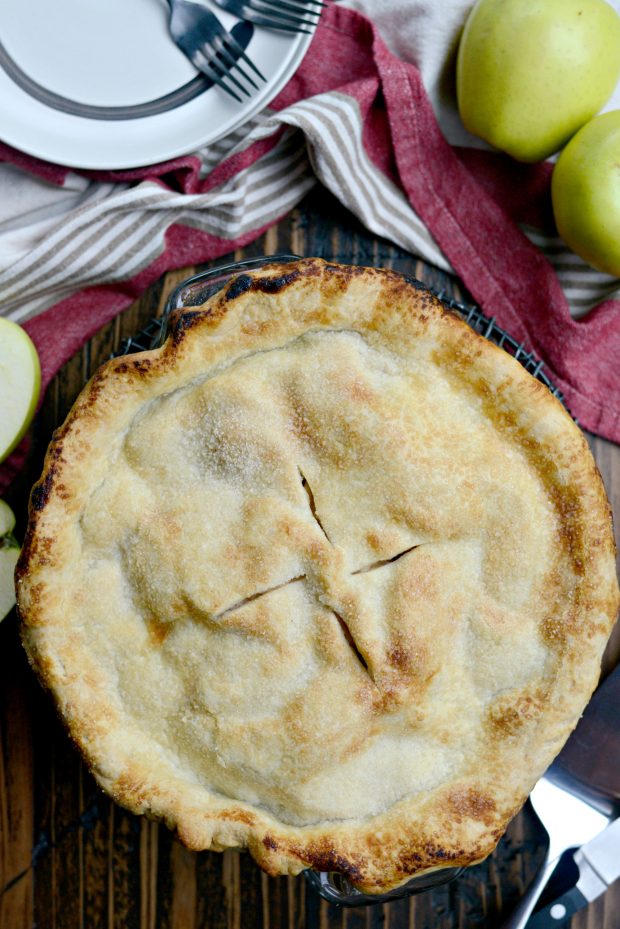
Sometimes my crimps hold and sometimes they don’t. That’s how it goes and it’s also how you know it’s a homemade apple pie. 🙂
#aintnoshameinmygame
Perfection.
Remember me telling you how I hosted my first Thanksgiving last year? Well I also made this homemade apple pie just for my father-in-law. So I made him this same exact recipe and he said, and I quote “best pie he’s had in a long time” and coming from him, that meant the world.
Enjoy! And if you give this Homemade Apple Pie recipe a try, let me know! Snap a photo and tag me on twitter or instagram!
Homemade Apple Pie
Ingredients
- 3 pounds golden delicious apples, peeled, cored and sliced 1/4 of an inch thick
- 3 tablespoons unsalted butter
- 1 tablespoon lemon juice, strained of seeds and pulp
- 1/2 cup sugar
- 1½ teaspoon homemade apple pie spice
- 2 shakes ground cinnamon
- 1/8 teaspoon of kosher salt
- 1 recipe homemade pie crust, divided and formed into 2 disks and chilled in refrigerator
- heavy cream, for brushing
- sugar, for sprinkling
Instructions
- Heat a large 12-inch skillet over medium to medium-high heat. Once the pan is hot, add in the butter-- it should sizzle.
- Add in the apple slices, stir to coat in the butter. Reduce heat to medium, cover and cook stirring occasionally until the apples are softened on the outside but still slightly crunchy on the inside. About 3 to 5 minutes.
- Stir in the lemon juice, 1/2 cup of sugar, apple pie spice (1 teaspoon of ground cinnamon can be substituted) and salt. Increase the heat under the pan to high, stir often until the juice release from the apples and thicken slightly. About 3 minutes.
- Spread apples onto a rimmed metal baking sheet to cool completely. Meanwhile, roll out pie crust to 12 inches and place into a deep pie dish. Trim off excess pie crust, leaving a 1-inch border. Roll out the top crust and refridgerate both crusts while apples cool.
- Position your oven rack to the lower third of your oven and preheat to 425℉ (or. 220℃).
- Pour cooled apples into the pie crust, and brush the crust edge with a little heavy cream. Place the second crust over top and trim the edge to align with the bottom crust. Fold and crimp edges. Brush the top of the pie with more heavy cream and sprinkle with more sugar. Use a paring knife to make air vents and immediately slide the pie into your preheated oven.
- Bake for 30-40 minutes or until the crust is deep golden brown, rotating it halfway through baking.
- Allow the pie to cool for 3 to 4 hours before slicing.
- Can be stored at room temperature for 3 to 4 days.
Recipe adapted slightly from Joy of Cooking
Buy the Cookbook: Simply Scratch : 120 Wholesome Homemade Recipes Made Easy Now available on Amazon »
THANK YOU in advance for your support!


I love your site. Been a follower for the past 3+ years! I loooove your apple hand pies (I’ve made several times) I will definitely be trying my hand at this gem. Mmmmm
Hi Rachael! So nice to meet you! That’s so great to hear, I hope you love this pie just as much or if not more 😉 Please let me know when you try it! <3
you have to talk about your apple choice. I’ve always been convinced that Macintosh are the best pie (and applesauce) apples. I obviously trust you with my cooking life, but golden delicious? is this okay? (I have a sink full of Macintosh right now (applesauce), so I’m going to forge ahead with those for now. But I’m open to being convinced of the golden delicious!)
Hi Danielle! You’re absolutely right, I didn’t talk about them! Why? Would you believe me if I said I was in an apple pie induced coma? I just went back and added a little paragraph about “why use golden delicious apples” — so thank you, good looking out!
My mom gifted me the Joy of Cooking cookbook when I was first married (15 years ago) and golden delicious are the apples they find work the best in pie. They claim (and I agree!) golden delicious hold their shape and wont flood your pie with juice. And I would add that they have a delicious flavor. So I’ve always used them. But I’m thinking of breaking from tradition and trying honeycrisp because those are my absolute favorite apples EVER.
As far as McIntosh… I think those apple are great for applesauce, but too soft for pie baking and would get really mushy. This is totally my assumption. I’ve only ever made pie with golden delicious apples.
<3
The pie crust link is broken. Pie sounds yummy.
Thanks for the heads up, Sharon! And thank you, let me know if you try the recipe out 🙂
Family loved the pie. I used Granny Smith as that was what I had available and the pie turned out great. The recipe calls for lemon juice but was lacking in the instructions to sprinkle over the cut apples. I use pastry flour in my crust for a very flaky crust. Made your Apple Pie Spice. Initially the cardamon flavor seemed strong, but once the pie was cooked, the flavors were perfect. Love your recipes. Thank you.
Hi Jen! I’m so happy you enjoyed the pie! Thanks for the note on the lemon juice, I’ll go add that in right now. AND thank you for taking the time to leave a comment and review, I really appreciate it! 🙂
This pie is awesome. I’ve made it almost a dozen times already! I even made it once just so to make my counter look pretty. I put it up for an auction at my church and it looked so classic next to all the others with a streusel topping.
Get out! Really!? You are awesome! I’m thrilled you love the pie, Holly! Thank you for coming back and leaving an awesome comment and review! I hope you have a great Thanksgiving! <3
I see you don’t use any flour in the filling to thicken, it doesn’t get runny without it? I really want to make this recipe for Thanksgiving and don’t want a soupy pie! Thanks! Donna
Hi Donna! You are correct, I do not use flour. This recipe was adapted from the Joy of Cooking cookbook, and they know a thing or two! From my experience, a runny pie is a result of using the wrong apples aka apples not meant for baking. I highly suggest golden delicious for this recipe, also allowing the pie to cool for 4+ hours will also help it set up as well. There is some juice released during baking, but I’ve never thought it to be super watery or soupy. However, I don’t think adding a tablespoon of flour would hurt, if it meant you would have peace of mind. I hope this helps!
Wow, I absolutely loved this recipe—the trick of pre-cooking the apples to prevent shrinkage is brilliant, as it keeps the filling lush and avoids that dreaded gap under the crust. The result looks unbelievably full and juicy, I also appreciate how well-explained the process is—from using Golden Delicious apples for balance, to tips for rolling out the dough and brushing the crust with cream and sugar for that irresistible golden finish.